

How to Install a Kayak Anchor Trolley System
Jun 26, 2020
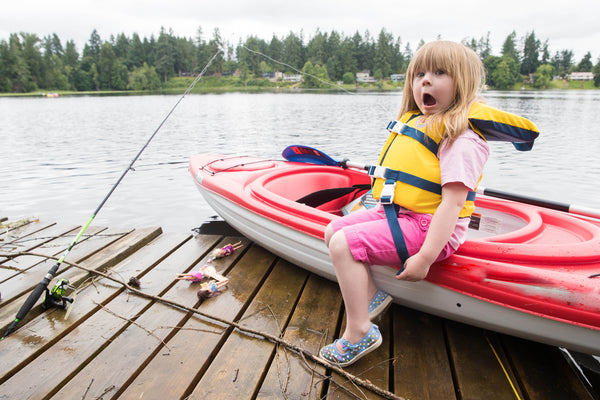
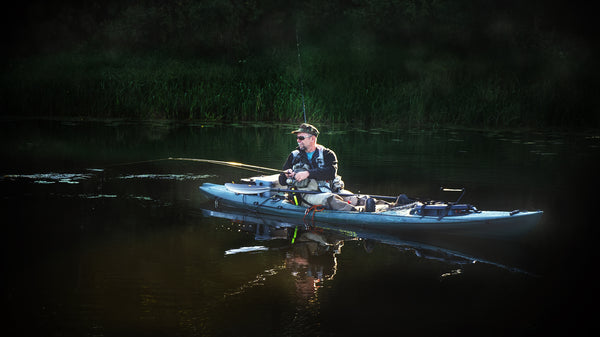
There are many benefits to kayak fishing including affordability, accessibility and adaptability. One thing that can vex beginner anglers, however, is how to gain control of their yak in situations where conditions could impede their ability to reel in a catch. A kayak anchor trolley system can be a simple solution.
What is a kayak anchor trolley system?
An anchor trolley becomes an extension of your anchor line by creating an adjustable attachment point. Once rigged, the system allows kayak anglers to adjust to changeable or challenging conditions with ease.
Once rigged, the system allows kayak anglers to adjust to changeable or challenging conditions with ease.
Advanced kayak anglers even use anchor trolleys on each side of their kayak to provide versatility in choosing an anchored position. After all, the potential for versatility is only as strong as the number of anchoring options you give yourself when rigging.
Why do I need one?
An anchor trolley system is an essential piece of kit needed to anchor your kayak safely.
The main reasons for investing in this affordable piece of gear include:
Eliminating the need for multiple anchor cleats
An anchor trolley allows you to shuttle the anchor line to the bow or stern of the kayak, eliminating the need for multiple anchor cleats.
Providing flexibility in changeable conditions
By adjusting the lines you can adapt quickly to changeable conditions. This allows you to safely anchor with the kayak in line with the prevailing tide, chop, wind and swell conditions.
Increasing stability
By adjusting your position to be in line with the wind and water conditions, you reduce the risk of the kayak being tipped by a crosswind or rough chop.
Compatibility with most anchors
Bay Sports Kayak Anchor Trolley Kits are compatible with most anchors meaning you can utilise an anchor you already own. Fear not if you haven’t got an anchor in your kit already, we have a package available with an anchor included!
How do I install a kayak anchor trolley system?
Check you have all the parts. The Bay Sports Anchor Trolley Kit contains:
Contents
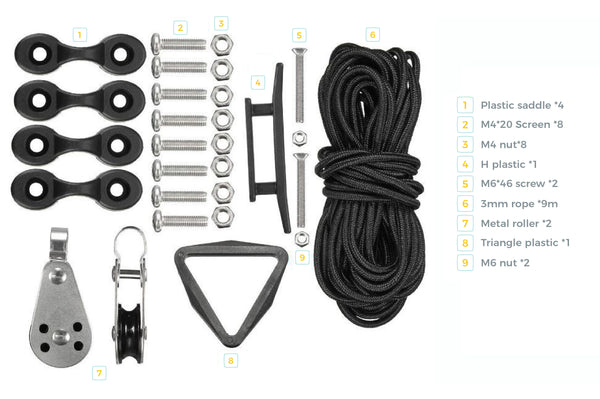
What's included in the Bay Sports Kayak Anchor Trolley Kit
- 4 x Plastic Saddles / Pad Eyes
- 8 x M4x20 Screws
- 8 x M4 Nut
- 1 x Plastic H / Horn Cleat
- 2 x M6x46 Screws
- 9m 3mm rope
- 2 x Metal Roller / Stainless Steel Anchor Pulleys with Nylon Sheave
- Triangle Plastic Anchor Tether
- 2 x M6 Nut
Tools
You will need the following tools:
- Drill with an 8.5mm or 9mm drill bit
- Phillips head screwdriver
- Clear silicon or another marine grade sealant
- Scissors
- Marker pen
Optional - pop rivet gun with 4mm and 6mm rivets to replace M4 and M6 screws and nuts
Installation
1. Position a pad eye (1) in a vertical position roughly 12-18 inches from the stern of the kayak, above the waterline
2. Make a mark through the two pad eye holes
3. Drill through your marked points
4. Thread one of the metal rollers through the pad eye so that the pulley is facing towards the centre of your kayak
- Figure 1
5. Secure the pad eye and pulley with the M4x20 screws (2) and M4 nuts (3). Seal the fixing points with sealant. If available, you can use pop rivets to avoid having to reach inside the kayak and seal the fixings
- Figure 1
6. Repeat steps 1-5 on the bow of the kayak, making sure that the second roller is also facing the centre of the boat.
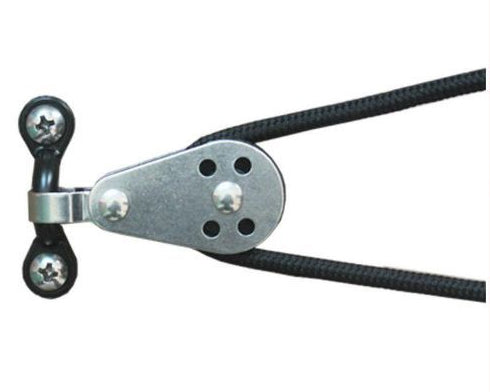
Figure 1
7. Install the remaining pad eyes along the length of your hull using the method in steps 1-5. These will act as a guide for your anchor line and stop it from creeping up over the gulley of your yak
- Figure 2
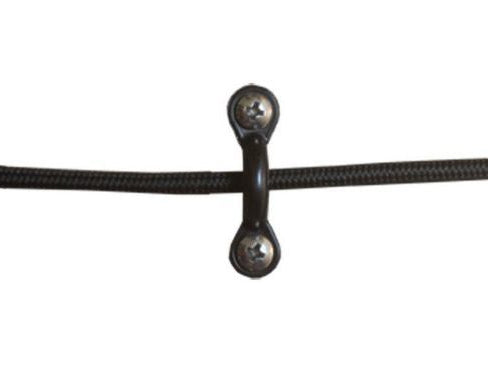
Figure 2
8. Next install your Horn Cleat - the Plastic H in the Kayak Anchor Trolley Kit. Again, use the cleat as a guide to mark your holes before drilling. Place the cleat around the centre of your kayak, in a position where you will comfortably be able to reach it from your seat. Use the same method as for the pad eyes to install the Plastic H / Horn Cleat
- Figure 3

Figure 3
9. Thread your rope as shown in Figures 1, 2 and 3. Thread the rope up through the pulley at the bow of the kayak, through the first guide pad eye, around the Horn Cleat, through the second guide and finally down through the second pulley. You will then be left with two loose ends
10. Take the Triangle Plastic Anchor Tether (8) and connect it to both loose ends. Use a fisherman’s knot to secure the rope snugly against the hull
- Figure 4
11. You can now attach your anchor line to the third corner of the Triangle Plastic Anchor Tether
- Figure 4

Figure 4
Congratulations! You have installed your Kayak Anchor Trolley System! The final result should look like this on the side of your kayak.

Your installed kayak anchor trolley system should look like this
How do I use a kayak anchor trolley system?
Now that your kayak anchor trolley system is installed, using it is super simple. Ensuring that all attachment points are secure, slide the anchor tether along the trolley to the desired anchoring point. Drop your anchor and adjust the trolley to find your ideal position.
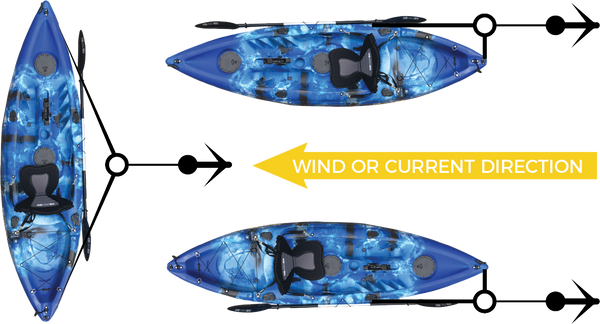
How to anchor your kayak using you trolley in different wind/current conditions
As conditions change you can continue to adjust your trolley to face different directions without the need to pull up and reset your anchor.
Safety First
Anchoring, if not done properly, is potentially dangerous. If you have never anchored a kayak before we recommend practising in calm or sheltered shallow waters before progressing onto more challenging conditions.
If you have never anchored a kayak before we recommend practising in calm or sheltered shallow waters
If you have a mate, practice together so you can assist each other if required. You can also reach out to experienced kayakers for more advice.
Find out more
- Check out the Bay Sports Kayak Anchor Trolley System
- Looking to get into Kayak Fishing? Read our Beginners Guide Here
- Take a look at our full range of Kayak Fishing Accessories